STEP ONE
Click on Timesheets tab at the top of the home page.
Please read the below instructions carefully to ensure your timesheet is submitted and authorised correctly so as to avoid any delay of your payment.
Please Note: You can add your hours throughout the week, by clicking Save Timesheet. Once you’re ready to submit your timesheet click Lock Timesheet & Submit for Approval.
You will not be able to log into the system if you are logged in elsewhere or you have not logged out properly
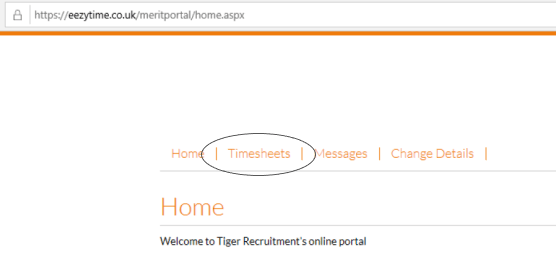
Click on Timesheets tab at the top of the home page.
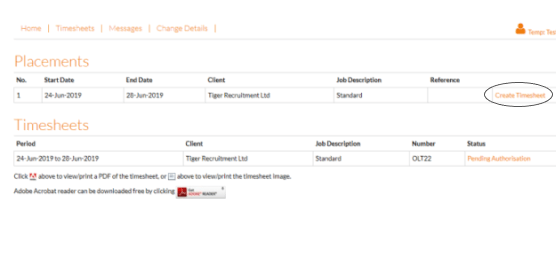
Click on Create Timesheet for the relevant placement.
Please be diligent when creating timesheets, ensuring that they are for the correct placement.
On this screen, you will also see previous timesheets that have been submitted and their status, e.g. whether they have been Submitted for Authorisation or Authorised.
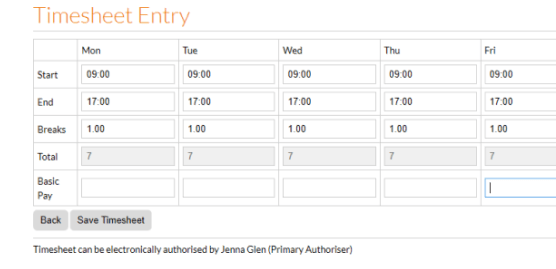
Enter your hours by typing in your start time, end time and break time for each day. An example of this is shown here.
Please note, the system works on a 24-hour clock. The system does not recognise punctuation, therefore if you simply type “9” for a 09:00am start, it will default to “09:00”.
You are also able to see who will be approving your timesheets below the timesheet itself.
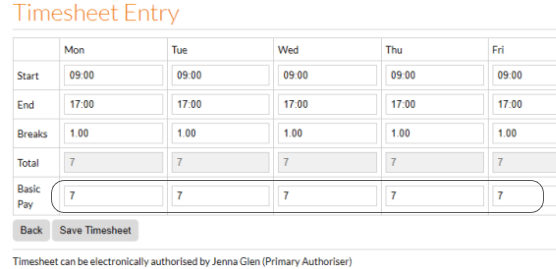
You will then need to allocate your hours to be either hourly pay or overtime (if applicable). Hourly pay should be attributed to standard hours and overtime should be attributed to any overtime hours paid at a different rate.
If you do not allocate your hours so that the totals match, you will not be able to save your timesheet. Please see below the error message that will show.
Please be aware that hourly pay and overtime may show as hourly or daily – continue to complete your timesheet as instructed above.
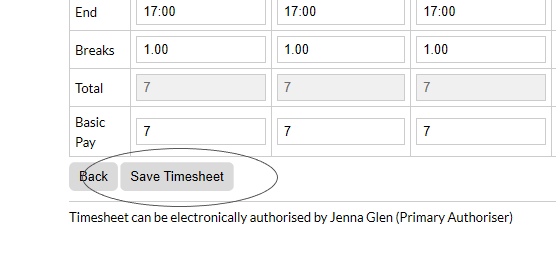
Click Save Timesheet. Please review your hours.
If the hours are incorrect, you can click Back to amend.
You can also delete the timesheet by clicking Delete Timesheet. Please note that this cannot be undone once actioned.
You can also save this to amend at a later date by clicking Save Timesheet.
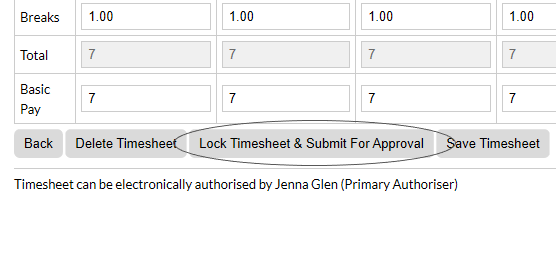
Once you are happy that the hours are correct, you can submit this for approval by clicking Lock Timesheet & Submit for Approval.
Your timesheet is now complete!
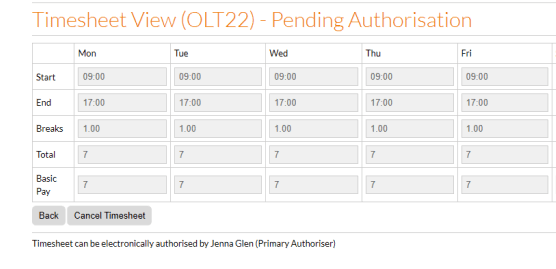
You will be able to see that the timesheet is now Pending Authorisation.
You have the option to Cancel Timesheet if amendments do need to be made.
You will be able to see a summary of the hours in the Total column.
Payslips are sent via email on Tuesday afternoons. These are password protected. Your password is your national insurance number.
Step 1: Click on the Holiday Requests on the home page.
Step 2: Click Request Holiday.
Step 3: Enter the start and end date and number of days/hours. Click Submit to send the request or Save to submit later.
Please note: requesting a certain amount of holiday pay does not guarantee that this is the amount that will be paid out. We have strict legal obligations to follow around holiday pay. If the request does not cover leave days, sick leave, or bank holidays or is made at the end of an assignment, the request will be declined.
You are able to message the payroll team directly through the portal, and they are also able to message you.
To access messages that the team have sent you, follow the below steps:
When the team have sent you a message through the portal, you will see an (!) next to the Messages tab.
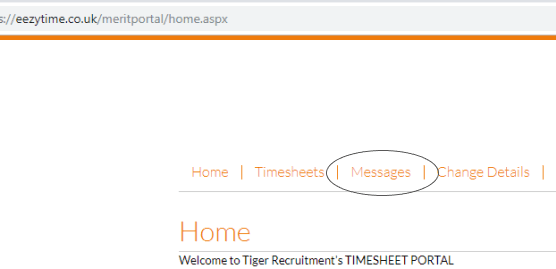
Click Messages tab to bring up a list of the messages that the team have sent that require your attention.
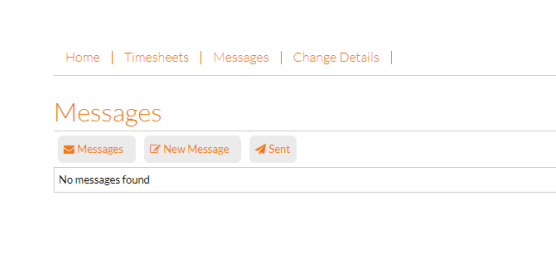
There are three options from here: view Messages, create New Message & see your Sent Messages.
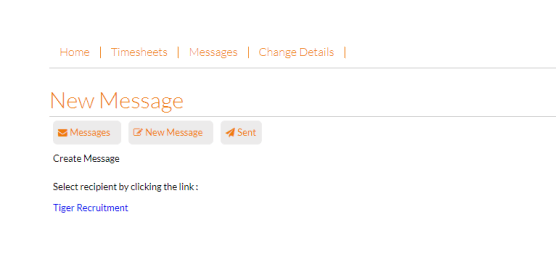
Click New Message to send a message. You’ll then need to select Tiger Recruitment as the recipient.
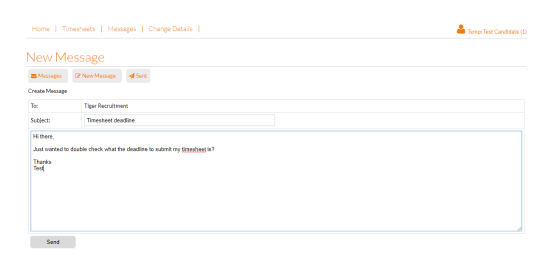
Type you message and click Send.
The screen will show your message has been sent.
The message will also show under Sent Messages.
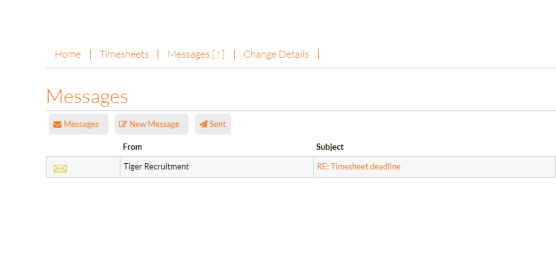
When you receive a reply a ! will show next to the Message tab on the home screen.
Click on the subject of the message.
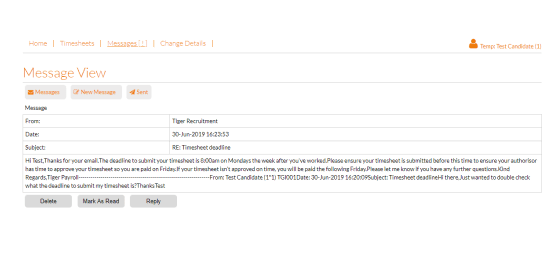
The response will then show on your screen.
You can then Delete, Mark as Read or Reply to the message.
You can submit any changes to your personal and bank details directly through the portal, along with changing your password.
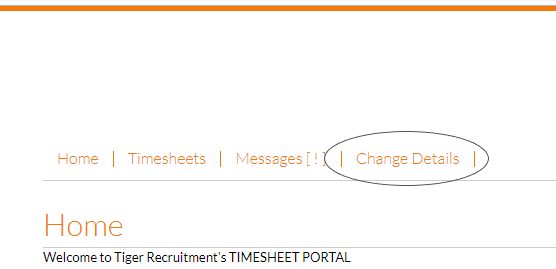
Click Change Details tab on the home page.
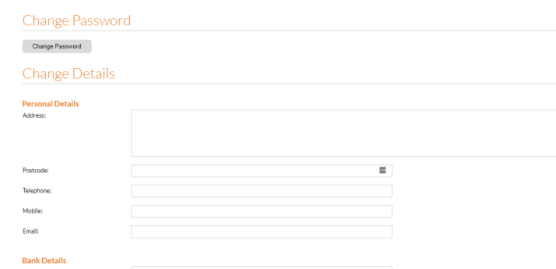
You have three options: Change Password, change your Personal Details and change your Bank Details.
Complete the details you’d like to change.
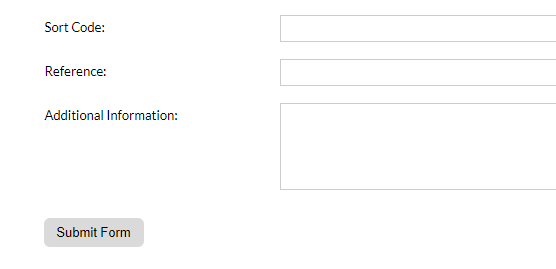
Click Submit Form.